


Misc > Carburetor Servicing
SHB 16/10

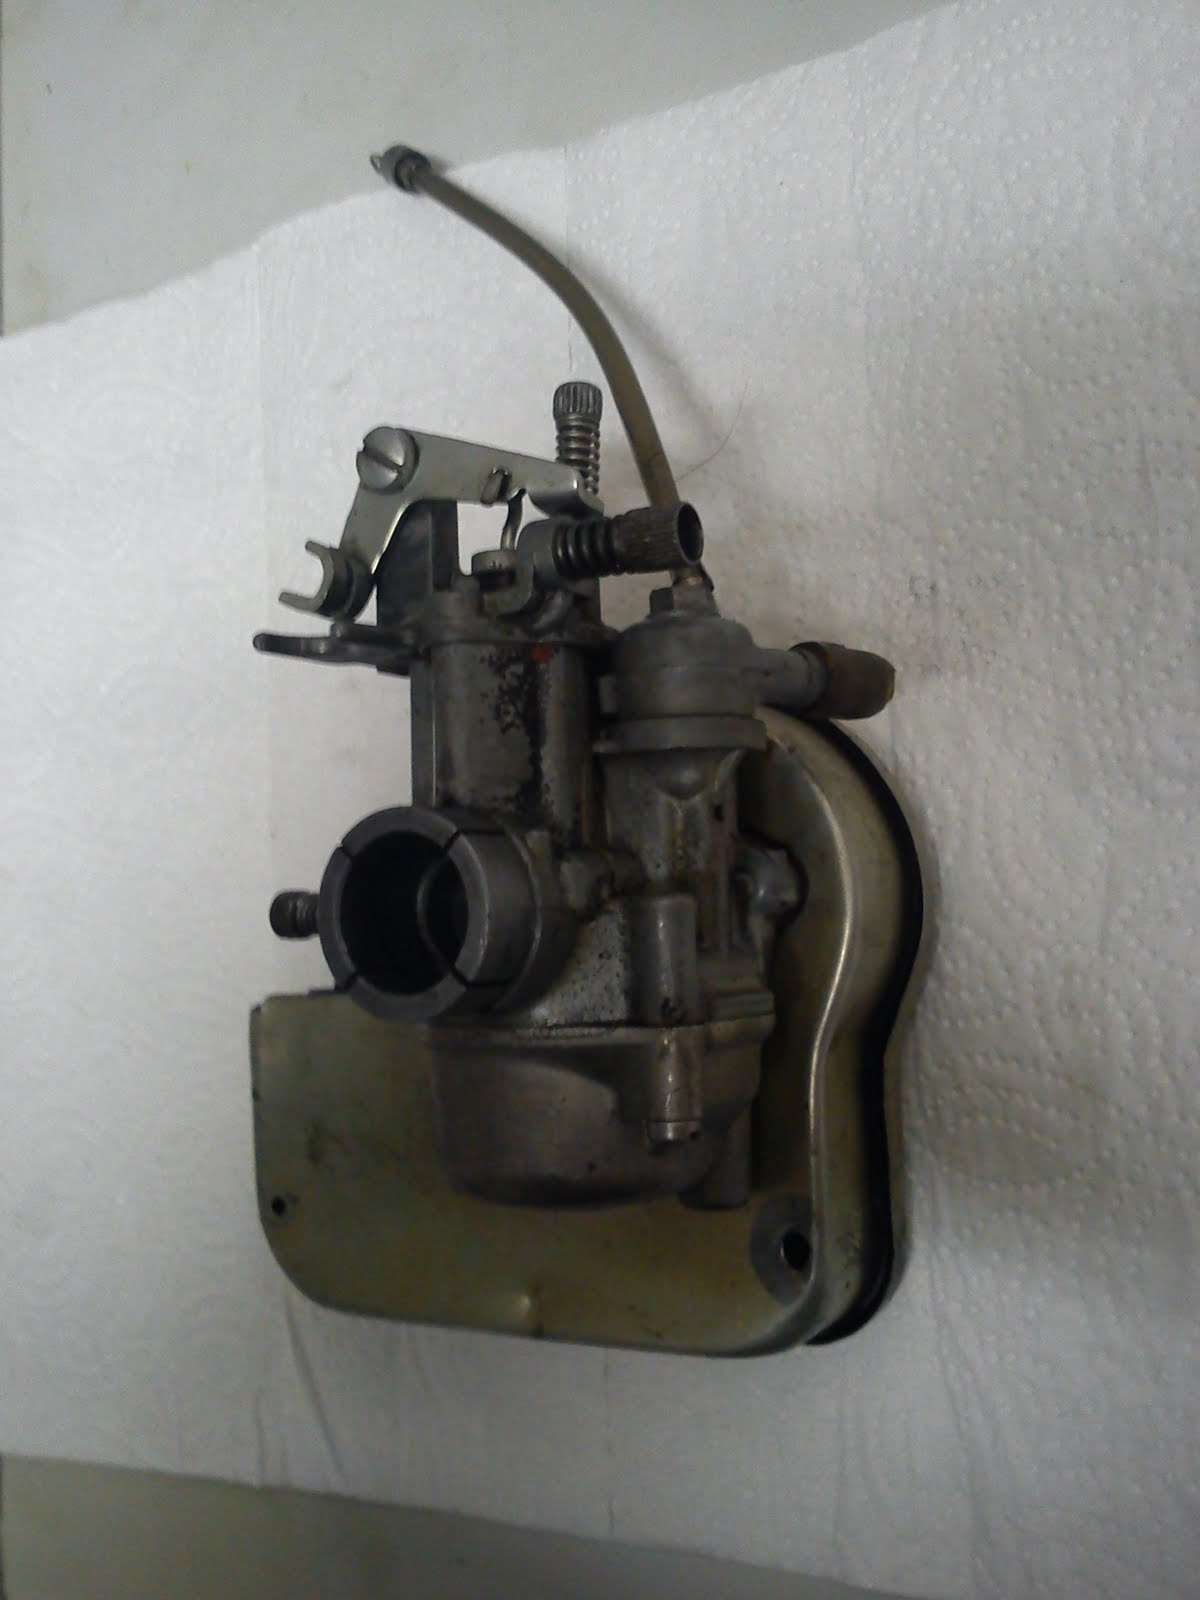
SHB 16/10
Here now the guide to a complete carburetor service. In this example we show a genuine 16-10 carburetor with tinplate filter box, just like it was used by the old models. First of all have a look at the outside condition of the carb. This one here already tells a story about a full clean-up necessity. Check out the amber-brownish coating which results from dried out petrol-oil mix. If you also find this on the inside you know two things for sure: 1.) the carb hasn't been used for a long time and 2.) it is most certainly not possible to get this one to work properly.
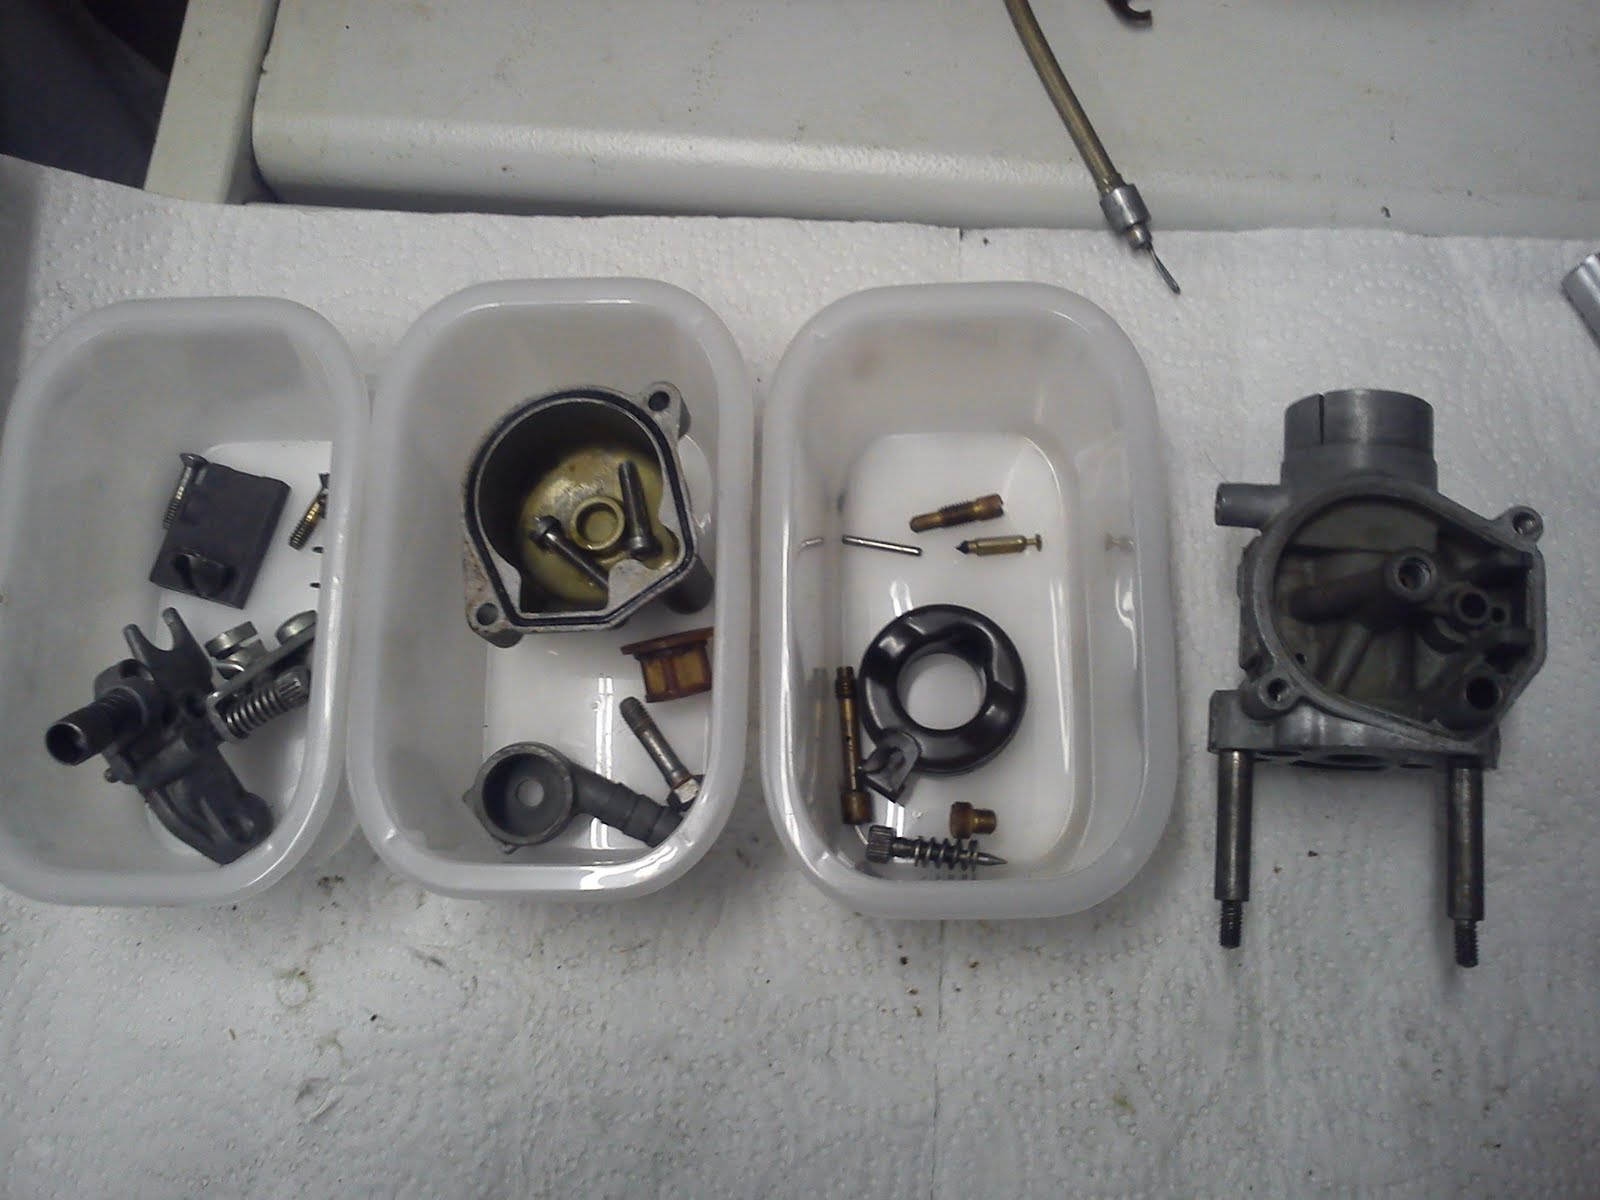
So let's start with opening the carb, get all the parts out and inspected. Please pay special attention to cleanliness! The smallest grain of dirt may lead to potential problems during the carb work. Like e.g. a jammed jet may result in a non- or badly working carb.
Air Filter
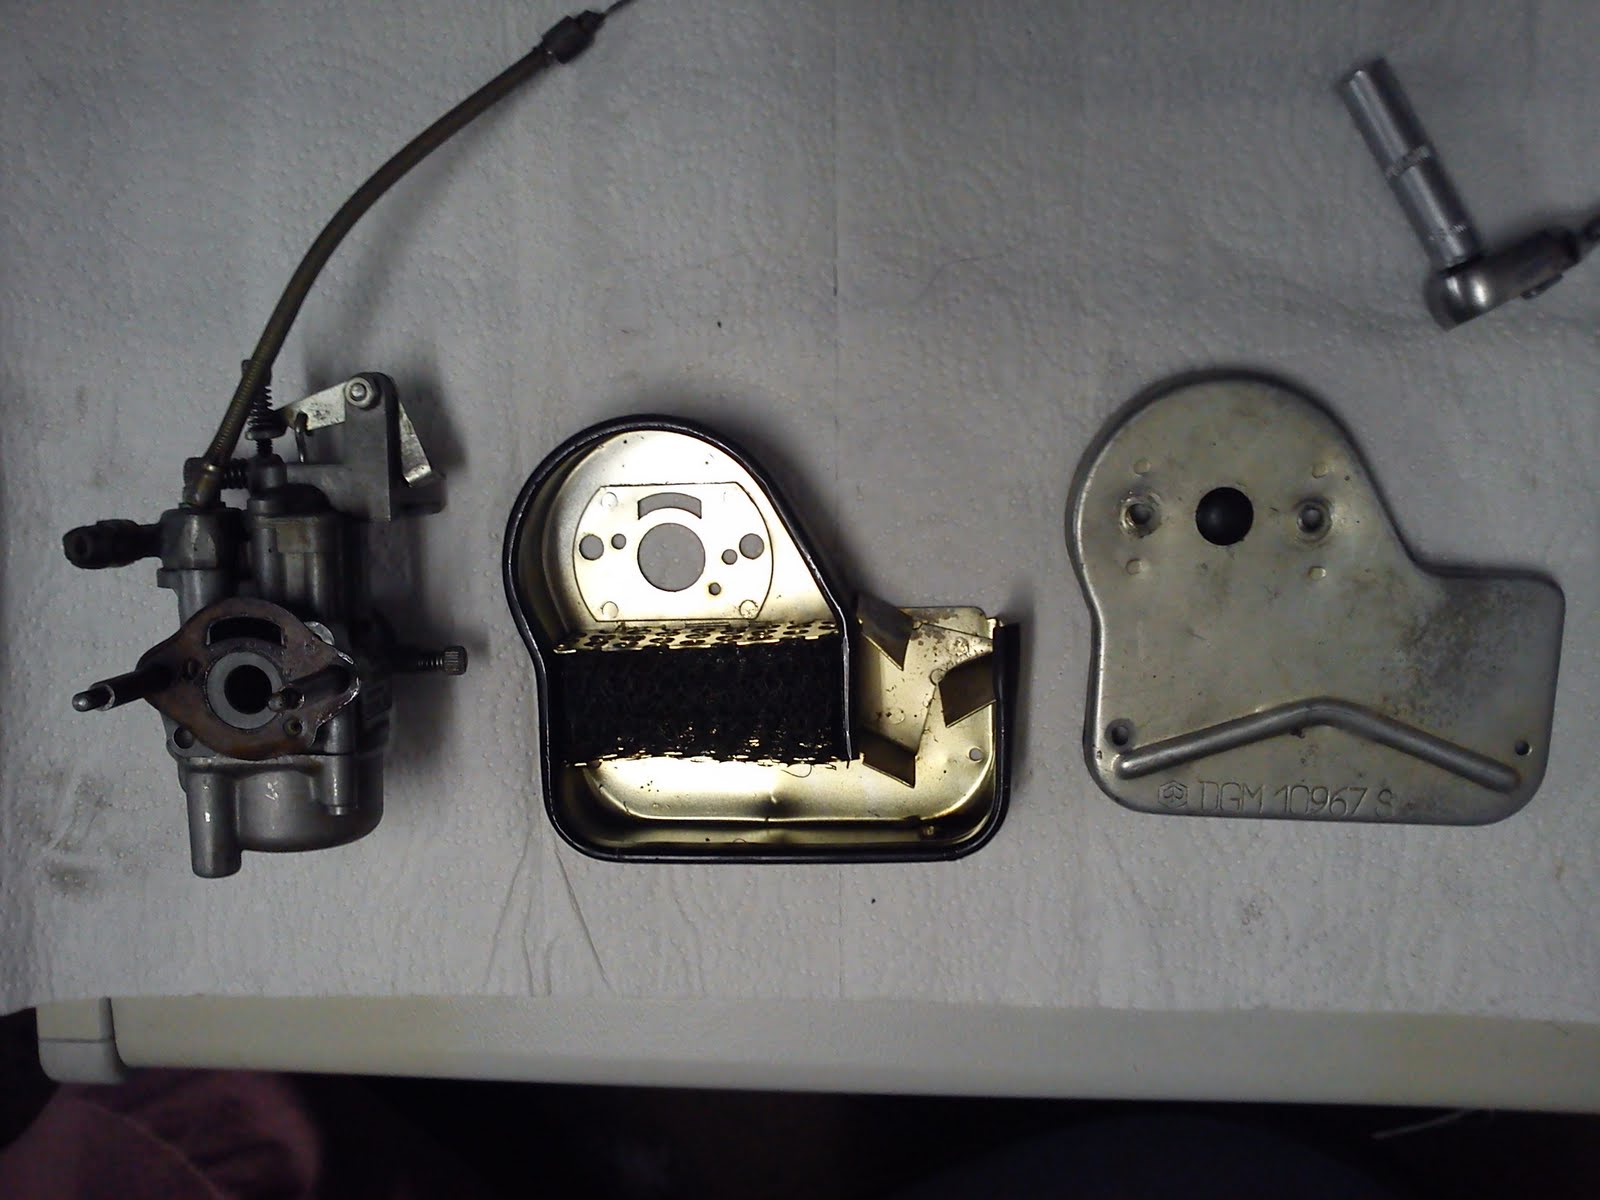
Air Filter
Not much to do here anyway. Check the tinplate box for any damage and that the filter is clean and not soaked up with fuel. Just clean it all as good as possible.
Choke
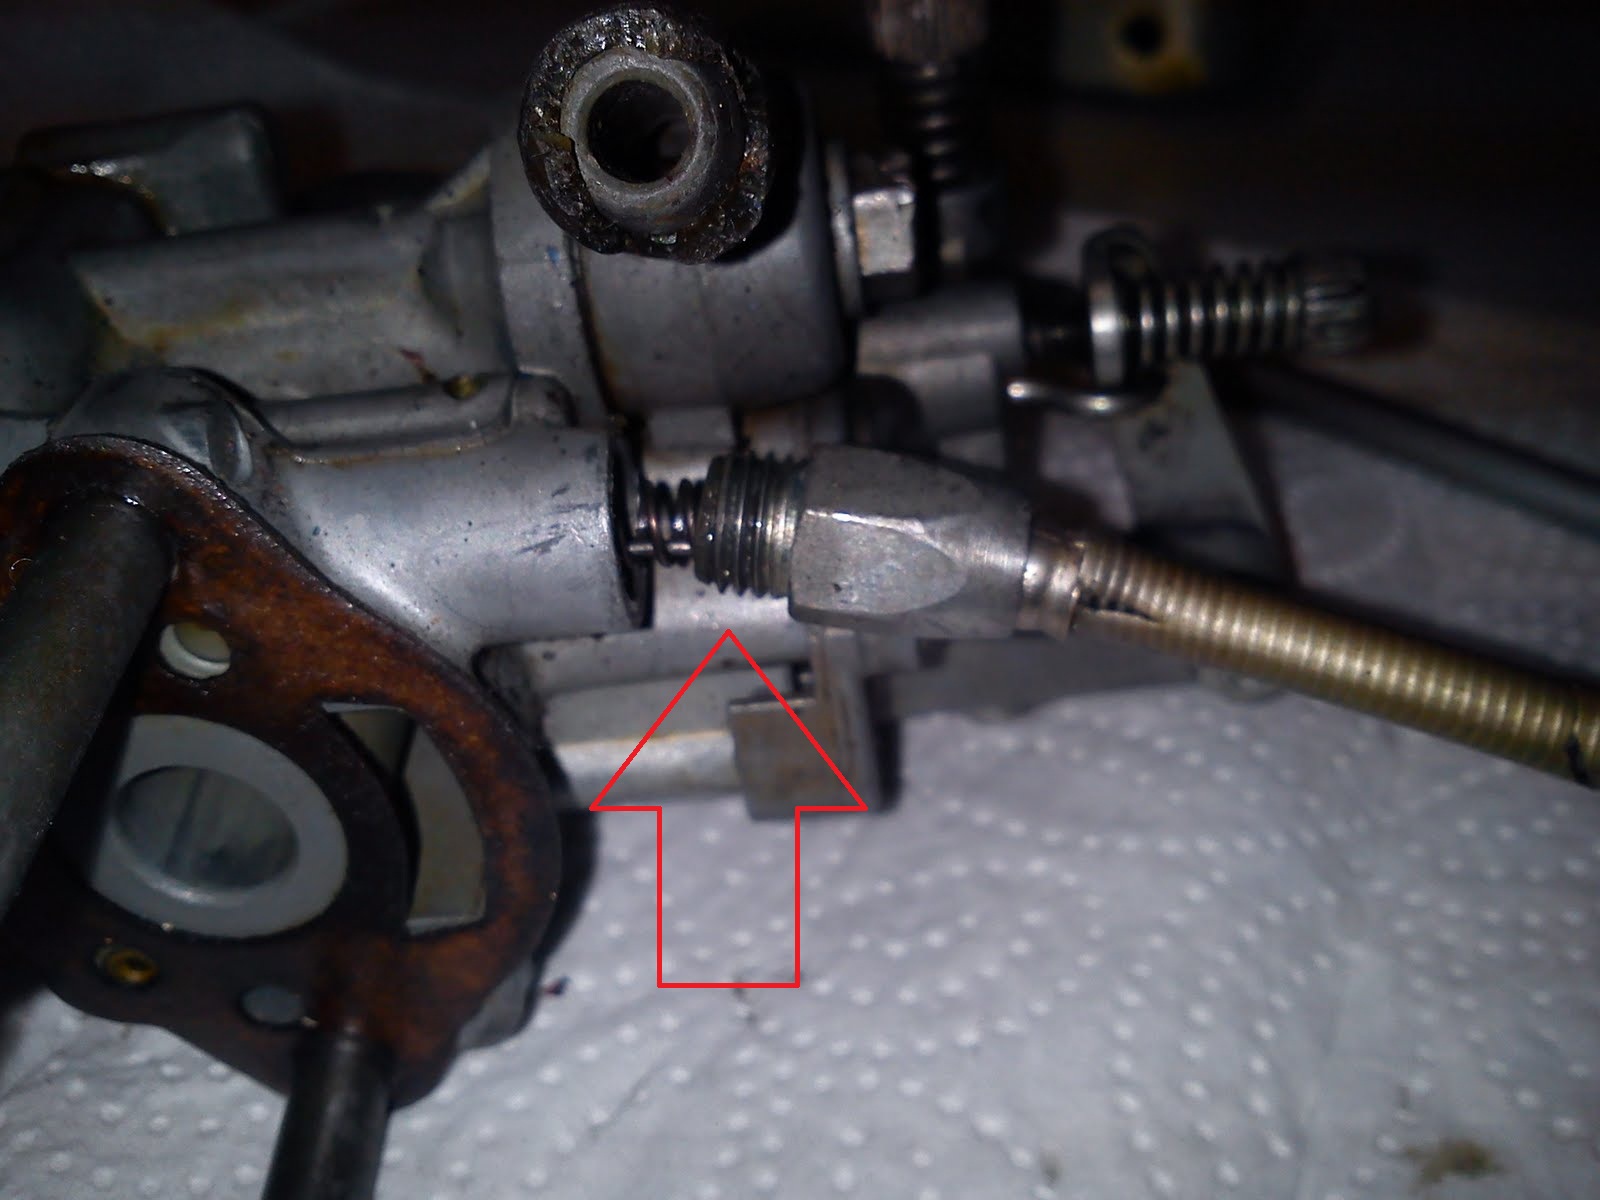
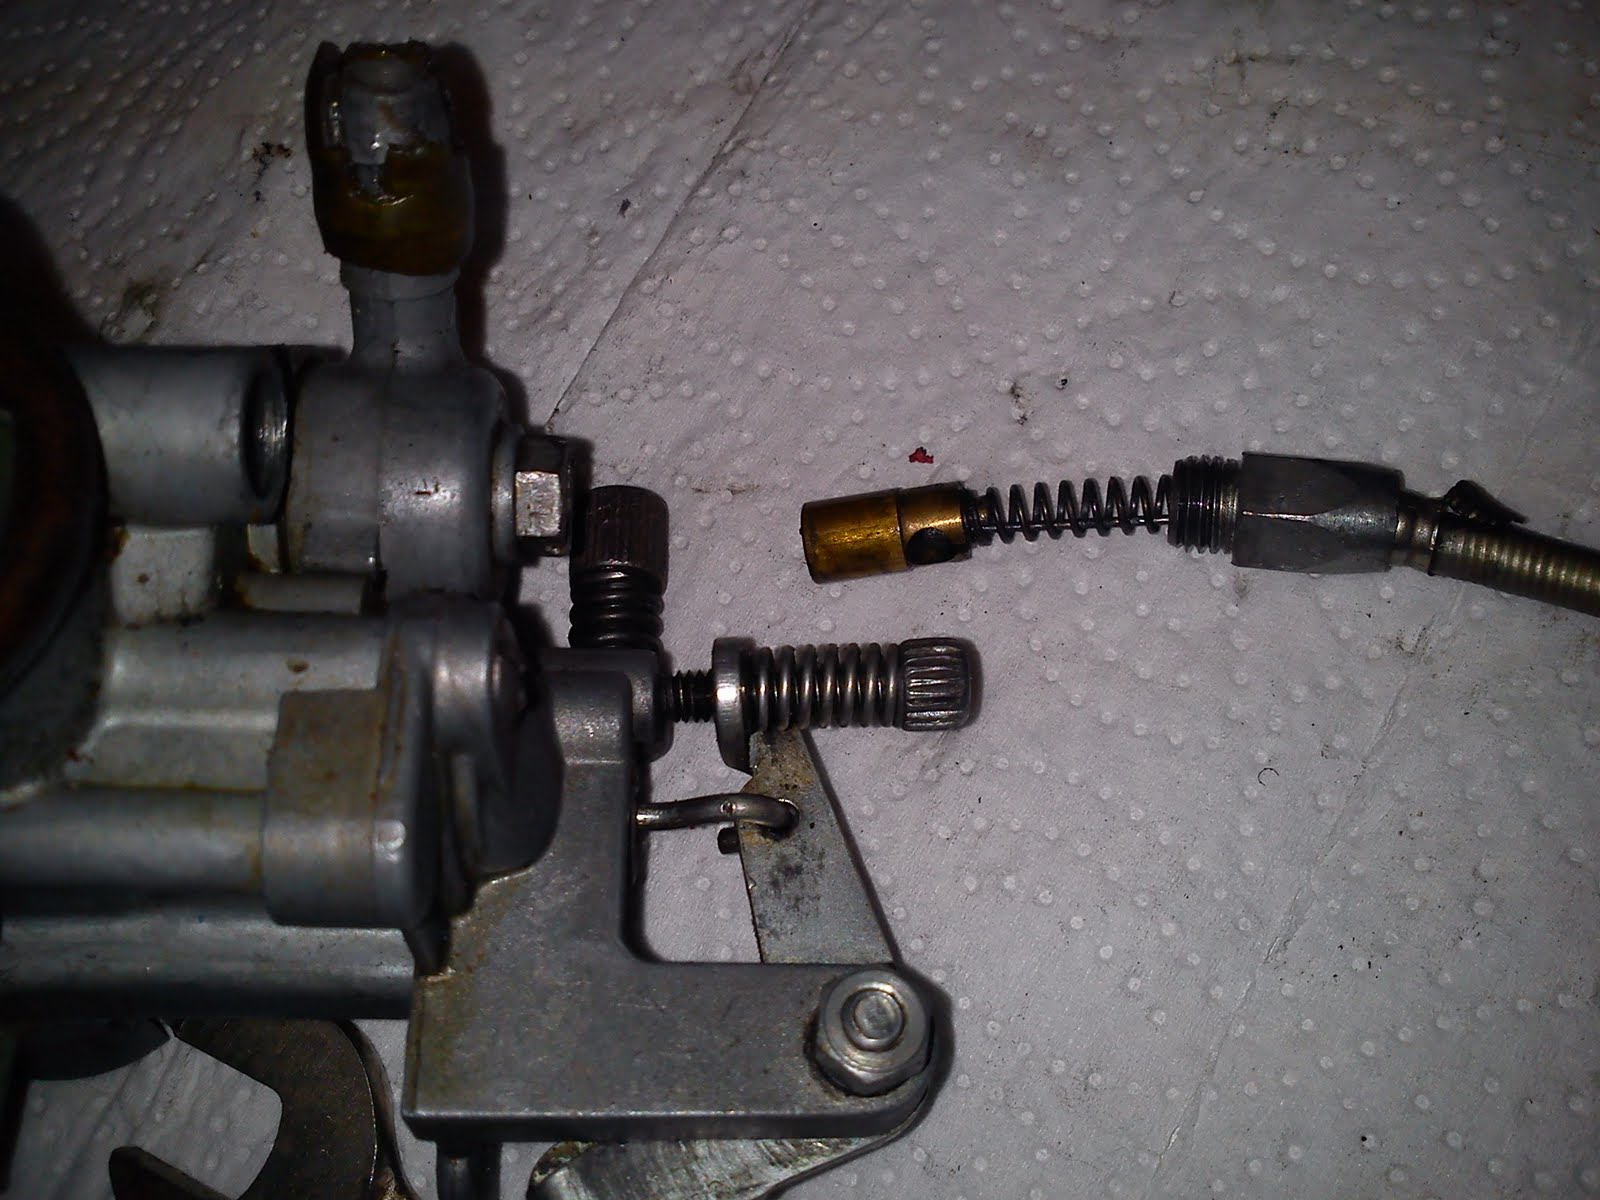
Choke
To remove the choke, unscrew the captive screw (wrench size 9) and pull out the choke cable and spring. We recommend to replace the choke cable with a new one. Usually it is part of a new cable set anyway.
Petrol Filter


Petrol Filter
Unscrew the center screw (wrench size 8). Relieve the inlet banjo and you will look at the petrol filter. In our case you can again see some amber-brownish coating from old oil. Definetely a new filter is needed here. Do not forget to replace the little paper ring that seals the screw against the inlet banjo.
Float Chamber

Float Chamber
Inside the opened carb you see again the amber-brownish coating. It is recommended to clean the float chamber and replace the rubber gasket with a new one. As soon as it is perished or out of shape or flattened you should replace it. This rubber gasket is usually part of the V50 set of Simmerrings.
Jets and Needles

Jets and Needles
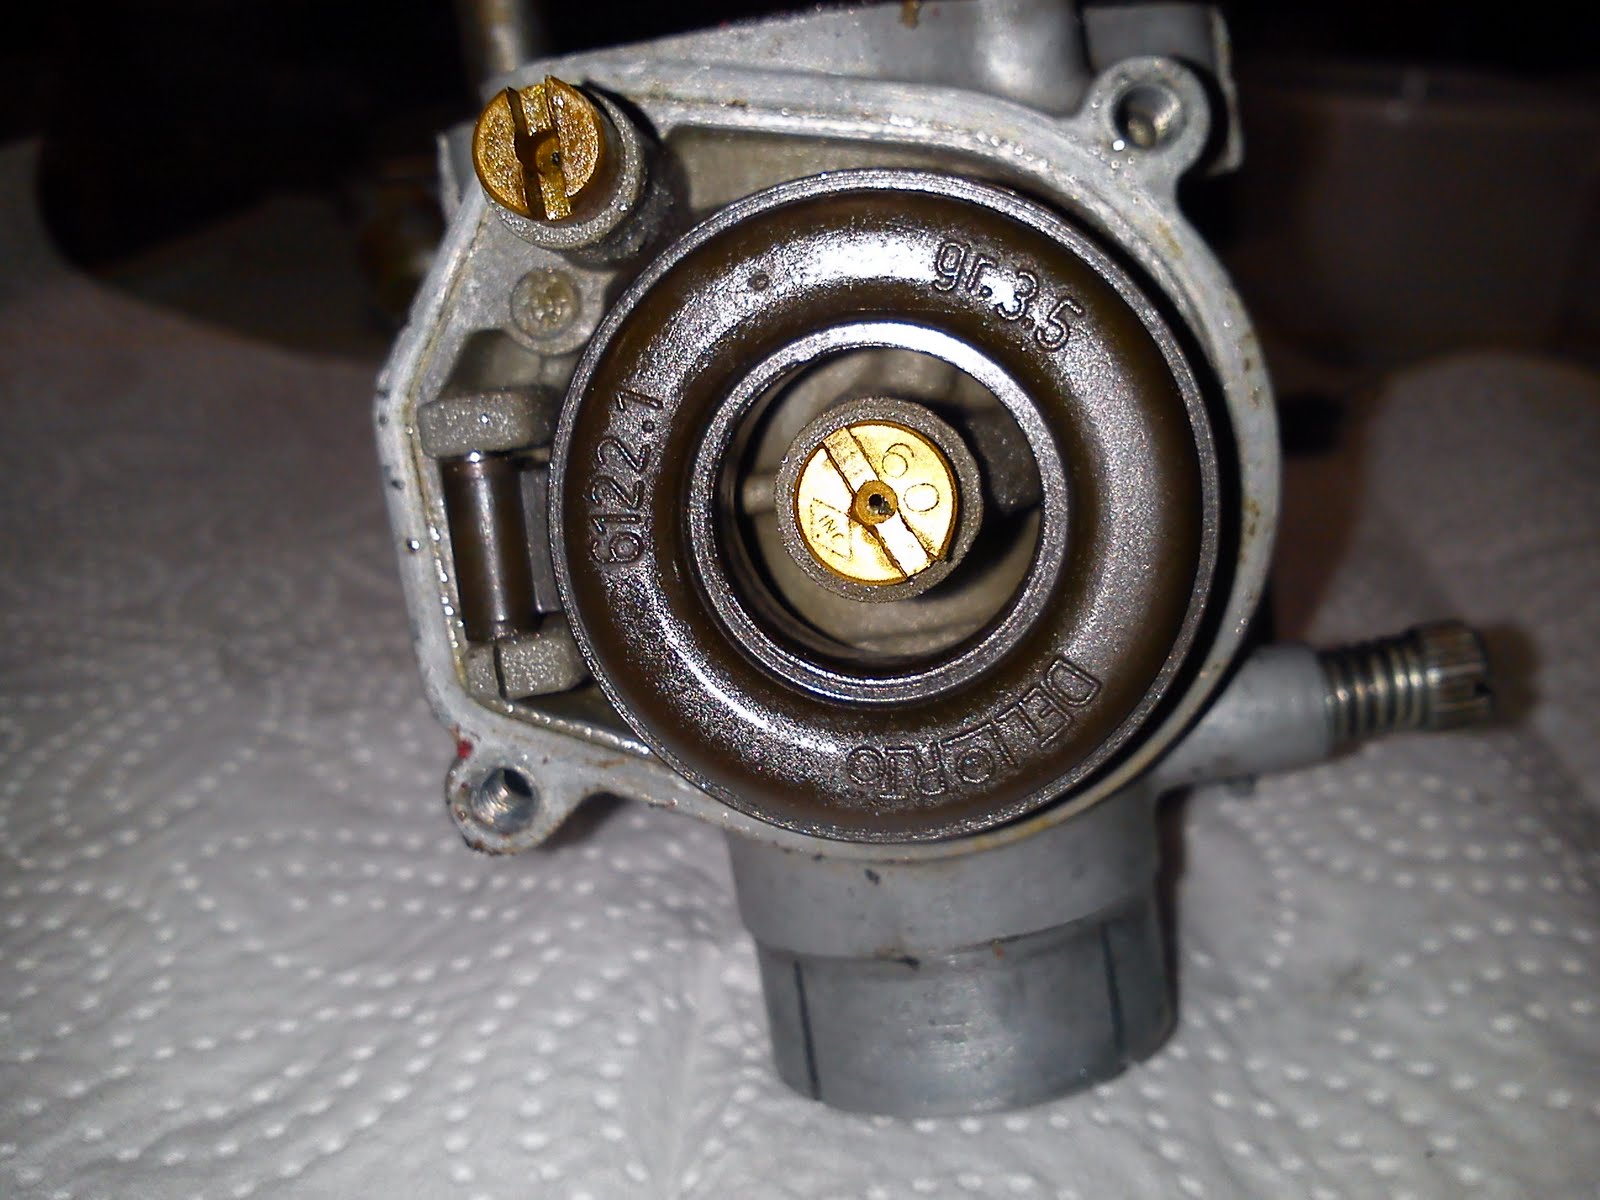
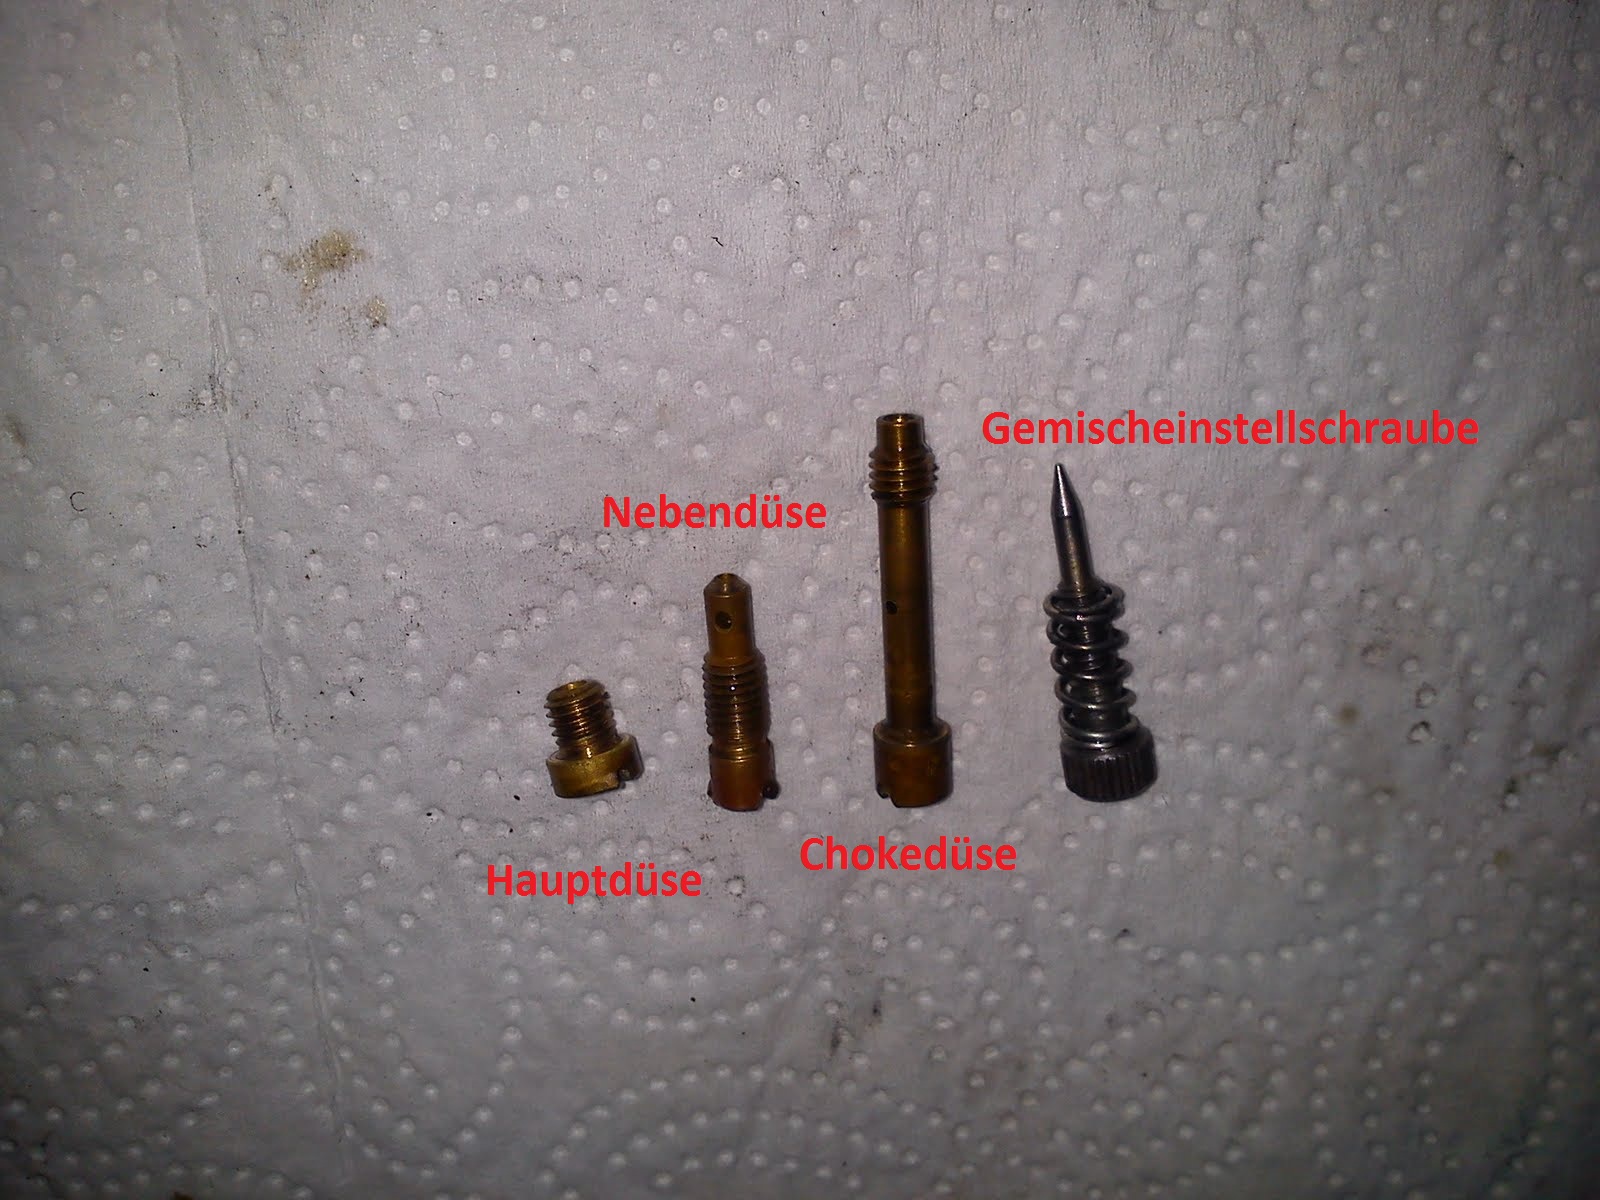
Below the most important jets and needles of a carb (left to right on pic):
- Main Jet
- Idle Jet
- Choke Jet
- Mix Srew
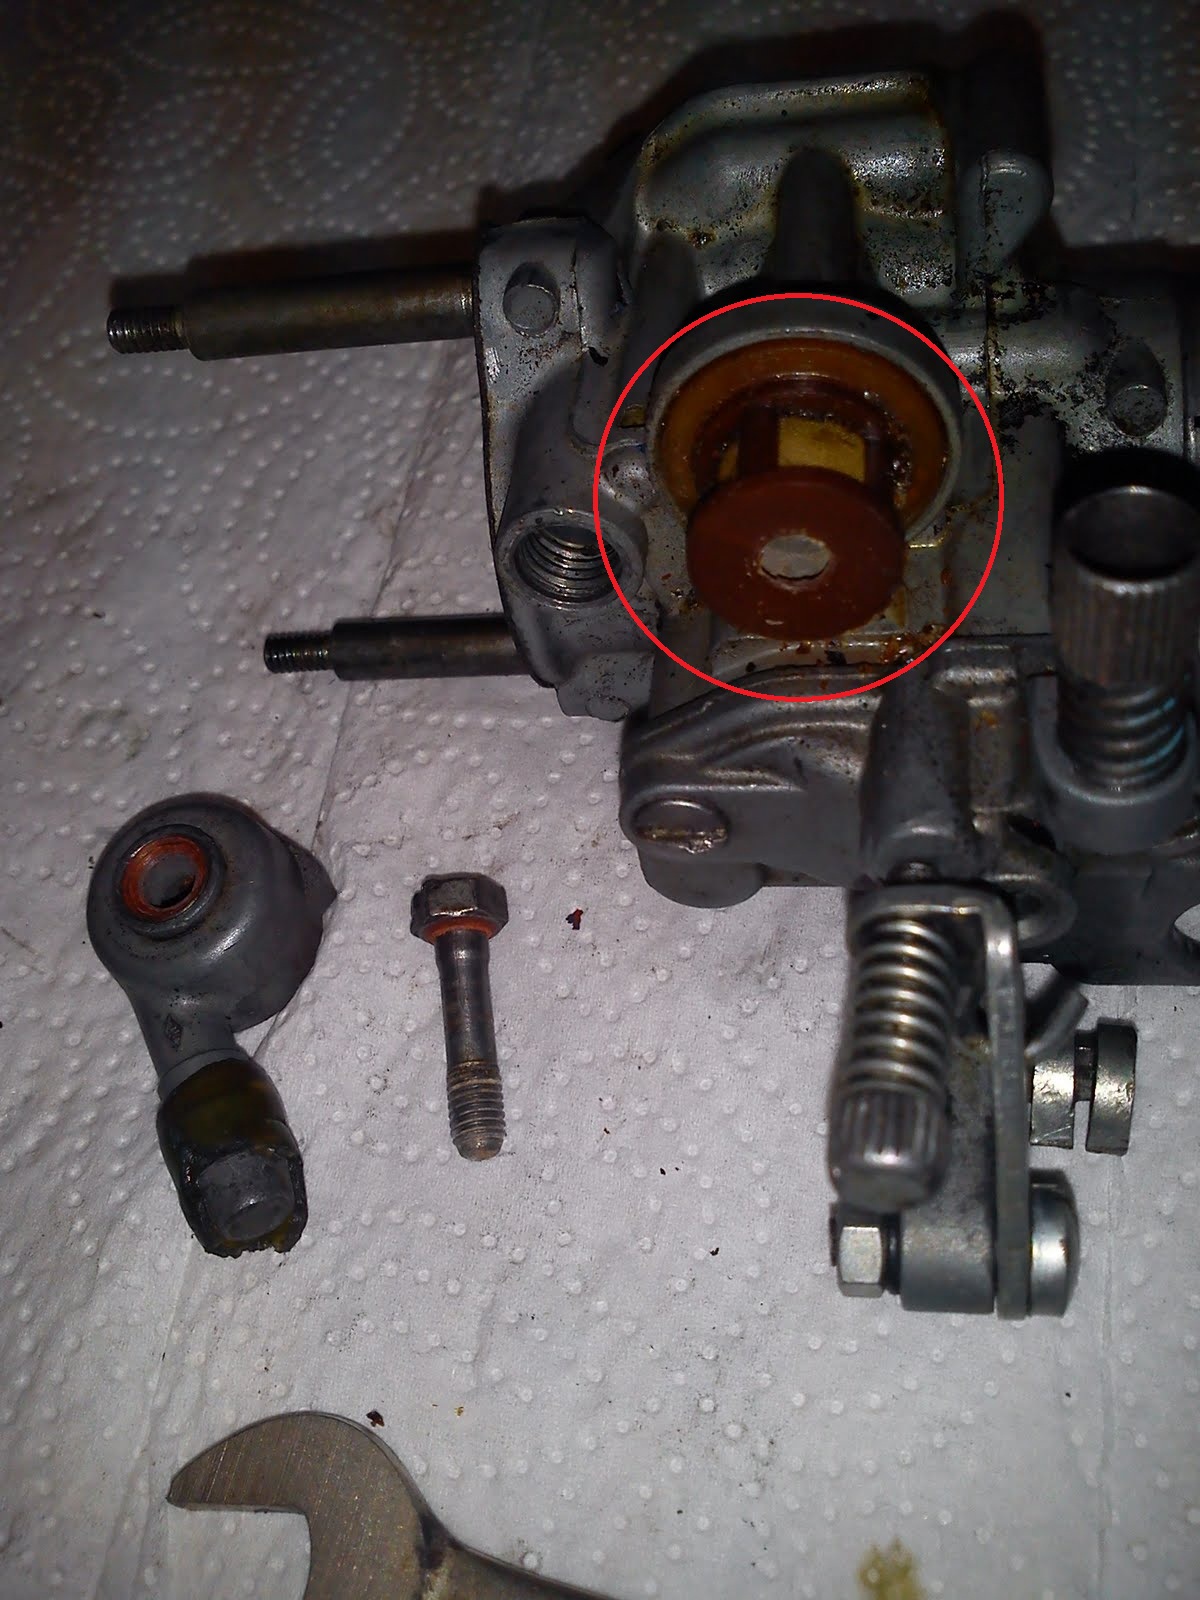
To reomve the float you have to remove the float pin first. Just push it out of its position using a small needle and pull it out using some needle nose pliers.
At the following picture you can see the float needle, which closes the fuel intake to prevent the float chamber from overflowing. Please check the float needle its rubber tip for any damage or misshaped material. A defect tip may result in an overflowing carb which isn' nice to have.
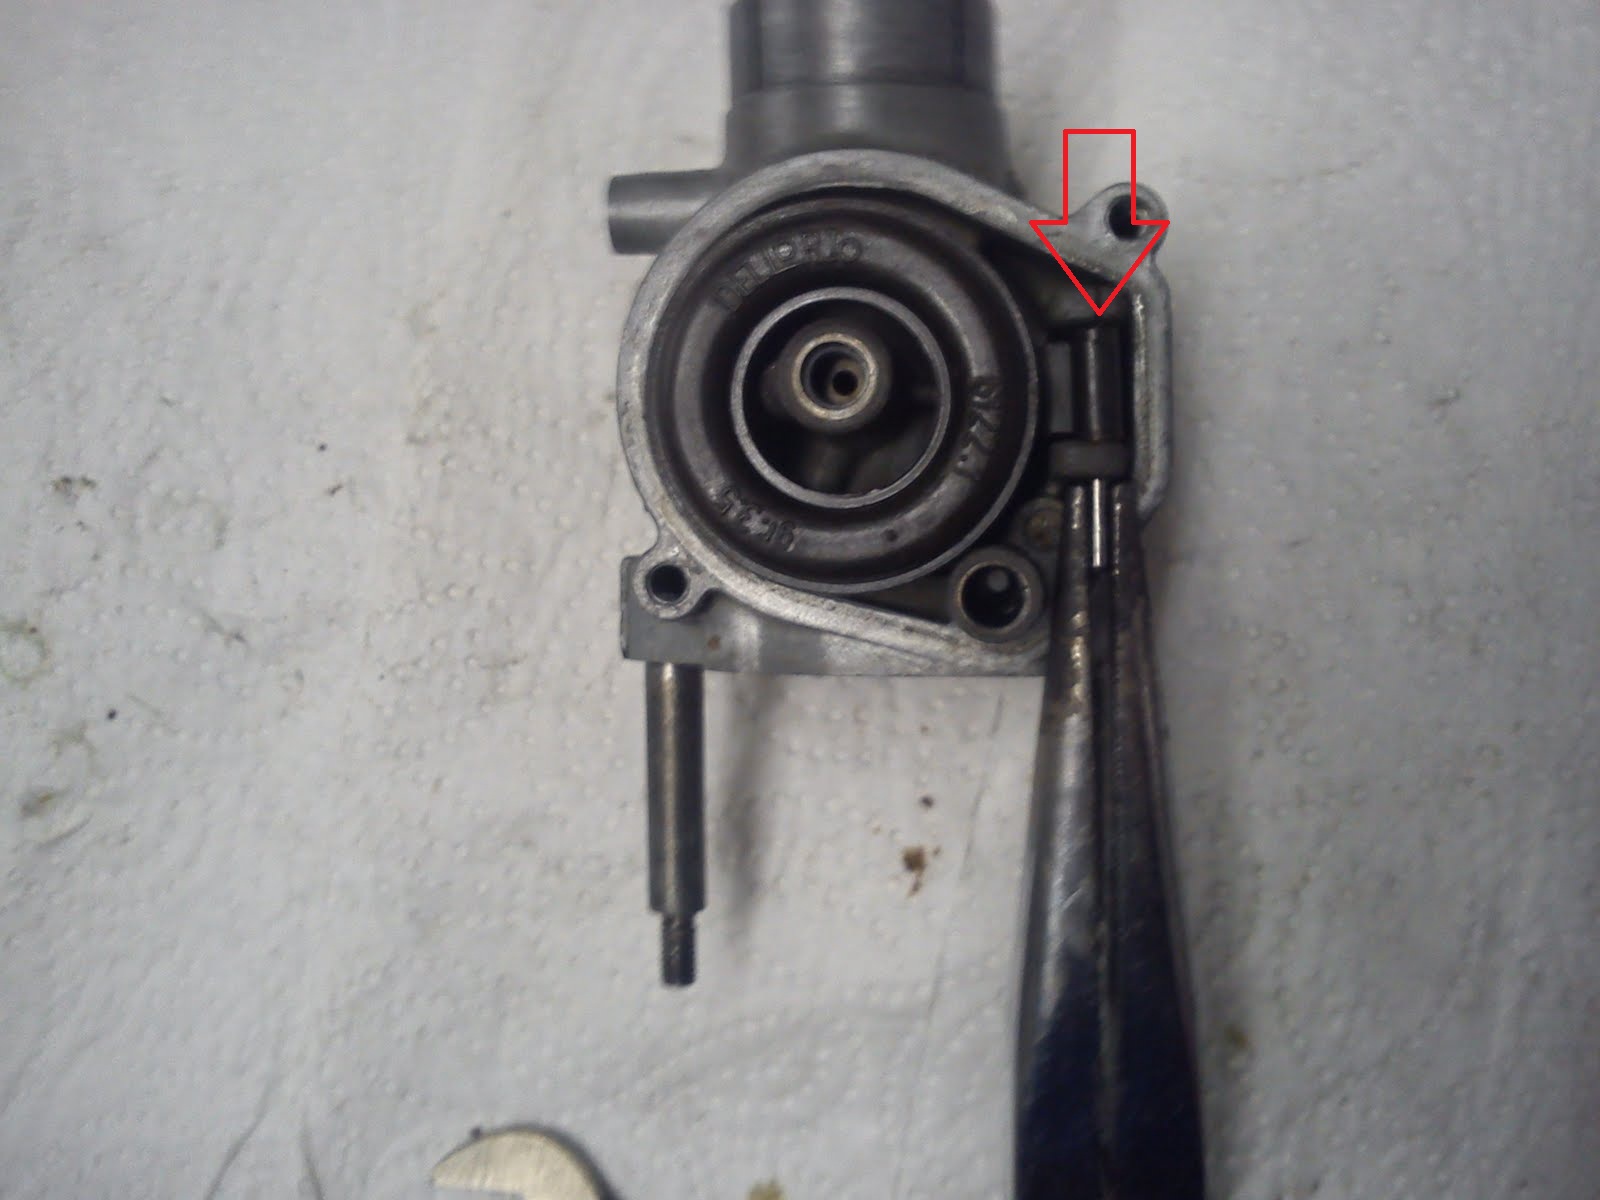
Throttle Slide

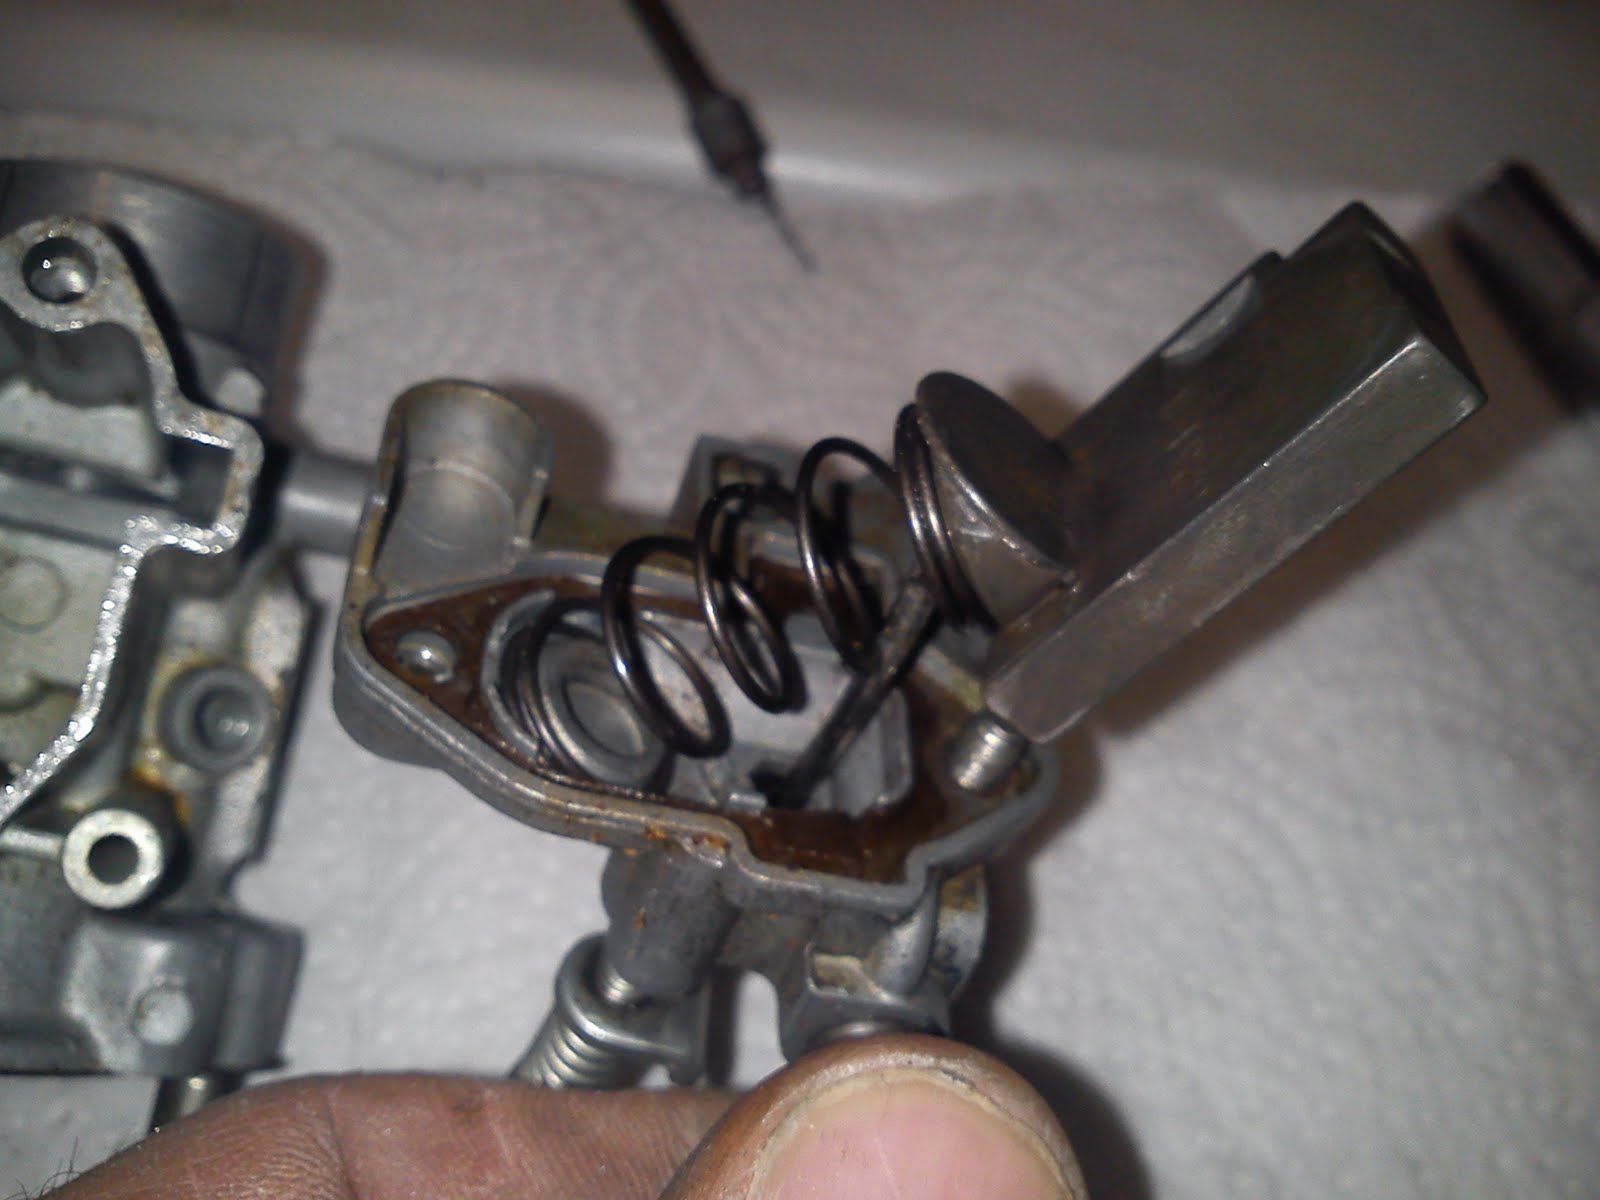

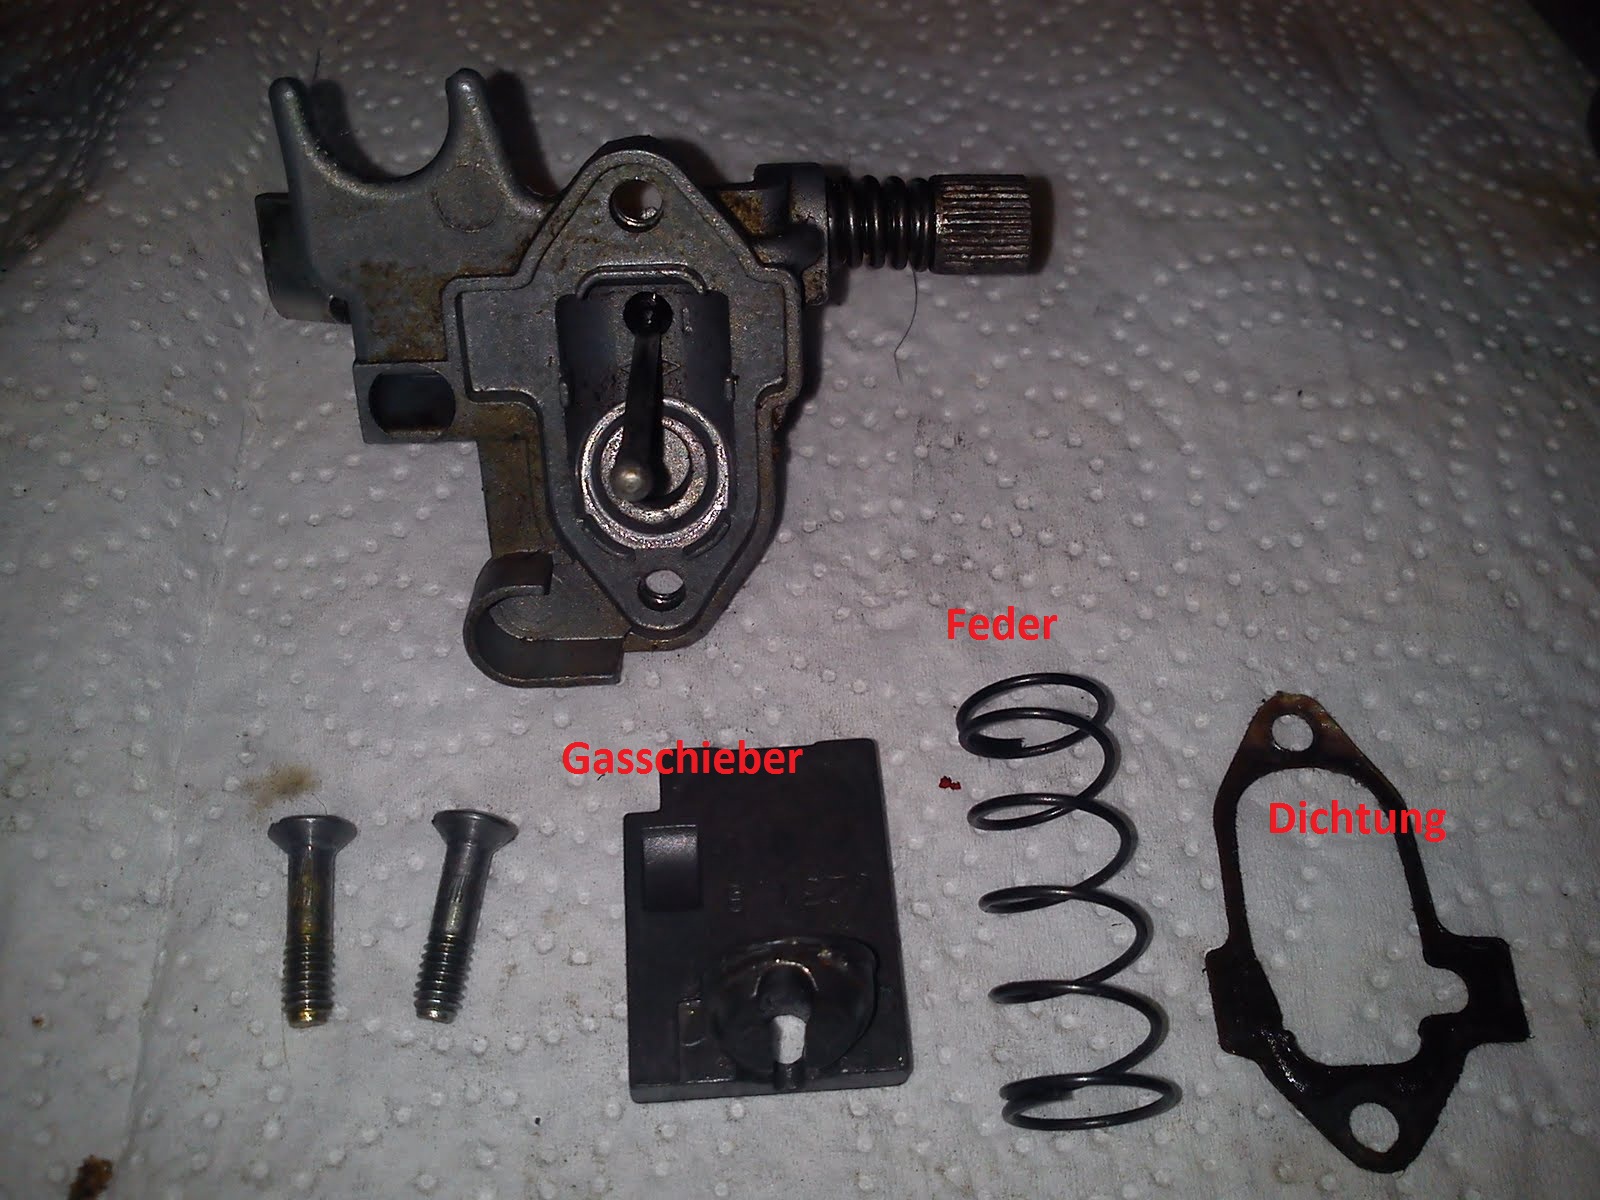
Throttle Slide
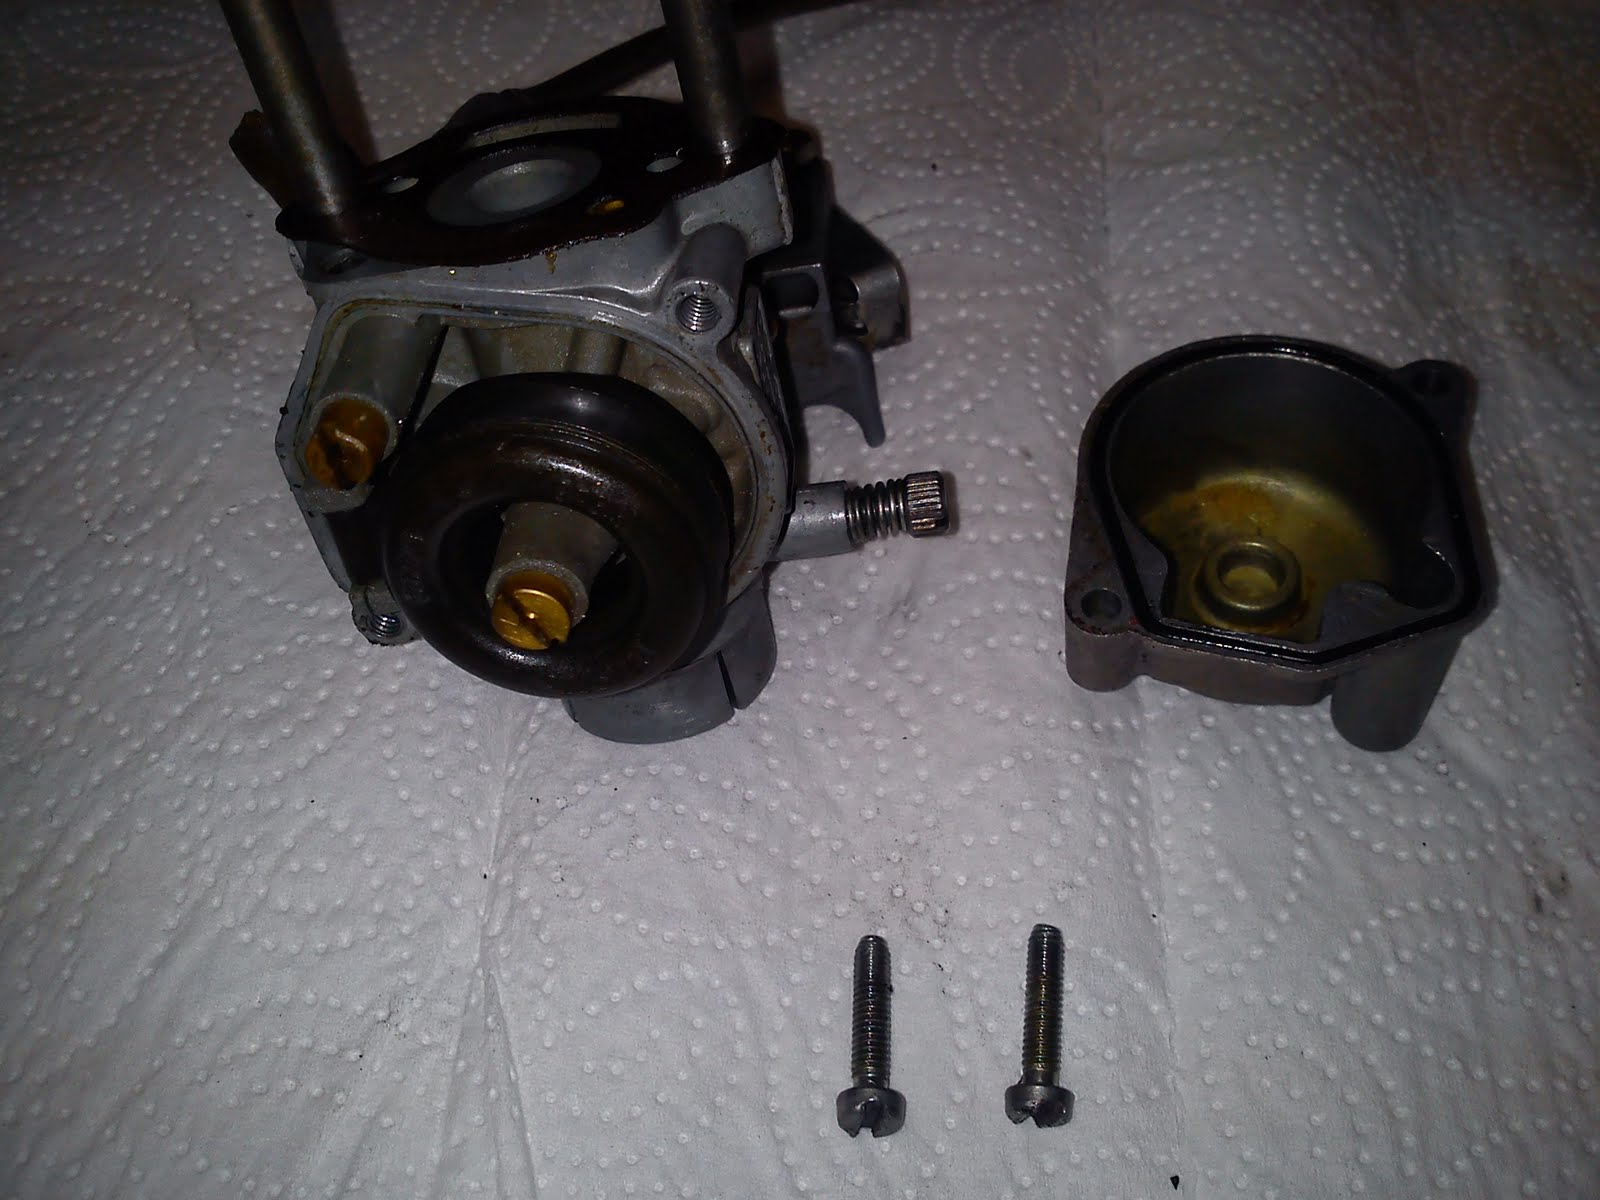
Note the position of the spring which has to be placed in exactely the same position again when assembling the carb. Otherwise the throttle slide might get caught.
There is another small paper gasket which has to be replaced with a new one. Please note that most gasket sets for carbs contain two different type of this paper gasket. Simple pull off the old one and compare with the new one to find the correct type to replace with. The V50 usually uses the angular version.
Cleansing


Cleansing
Preclean all disassembled parts thoroughly. You may now use an ultrasonic cleaner in order to remove the last remaining grimes. The amber-brownish coating which may be blocking the jets can only be removed either mechanically (not recommended as the risk is high to damage the jet) or by exposing the parts to thinner over some days. When in doubt you better replace the jets accordingly.
Assembly
Assembly
After all parts have been cleaned, dried with compressed air and all gaskets and needed new parts are at hand, you can start to assemble the carb again in reverse order.